 QueueScope
 / Getting started
Your first BullMQ queue in QueueScope
Install the native Mac app, explore sample jobs without a Redis connection, then inspect your own queues with a read-only profile.
QueueScope is free and MIT licensed. The packaged app requires macOS 14 or later, supports Apple Silicon and Intel, and targets BullMQ 5.77.x Redis layouts. Its Node runtime is included. You do not need a QueueScope account or a dashboard server.
1. Install the Mac app
Extract the ZIP, move QueueScope to Applications, and open it. The release app is signed and notarized. Prefer Homebrew? Install from our tap:
brew install --cask raynirola/tap/queuescope
To check for app updates later, choose Check for Updates… from the app menu.
2. Try the offline demo
Open Connection Manager and choose Explore offline demo. No Redis server or credentials are needed. The demo contains three sample queues and three failure groups; all mutations are disabled.
- Open Failure inbox and expand an error group to see related jobs.
- Choose Inspect to read a job’s payload, attempts, and failure details.
- Open the job’s parent/child flow to follow its dependencies.
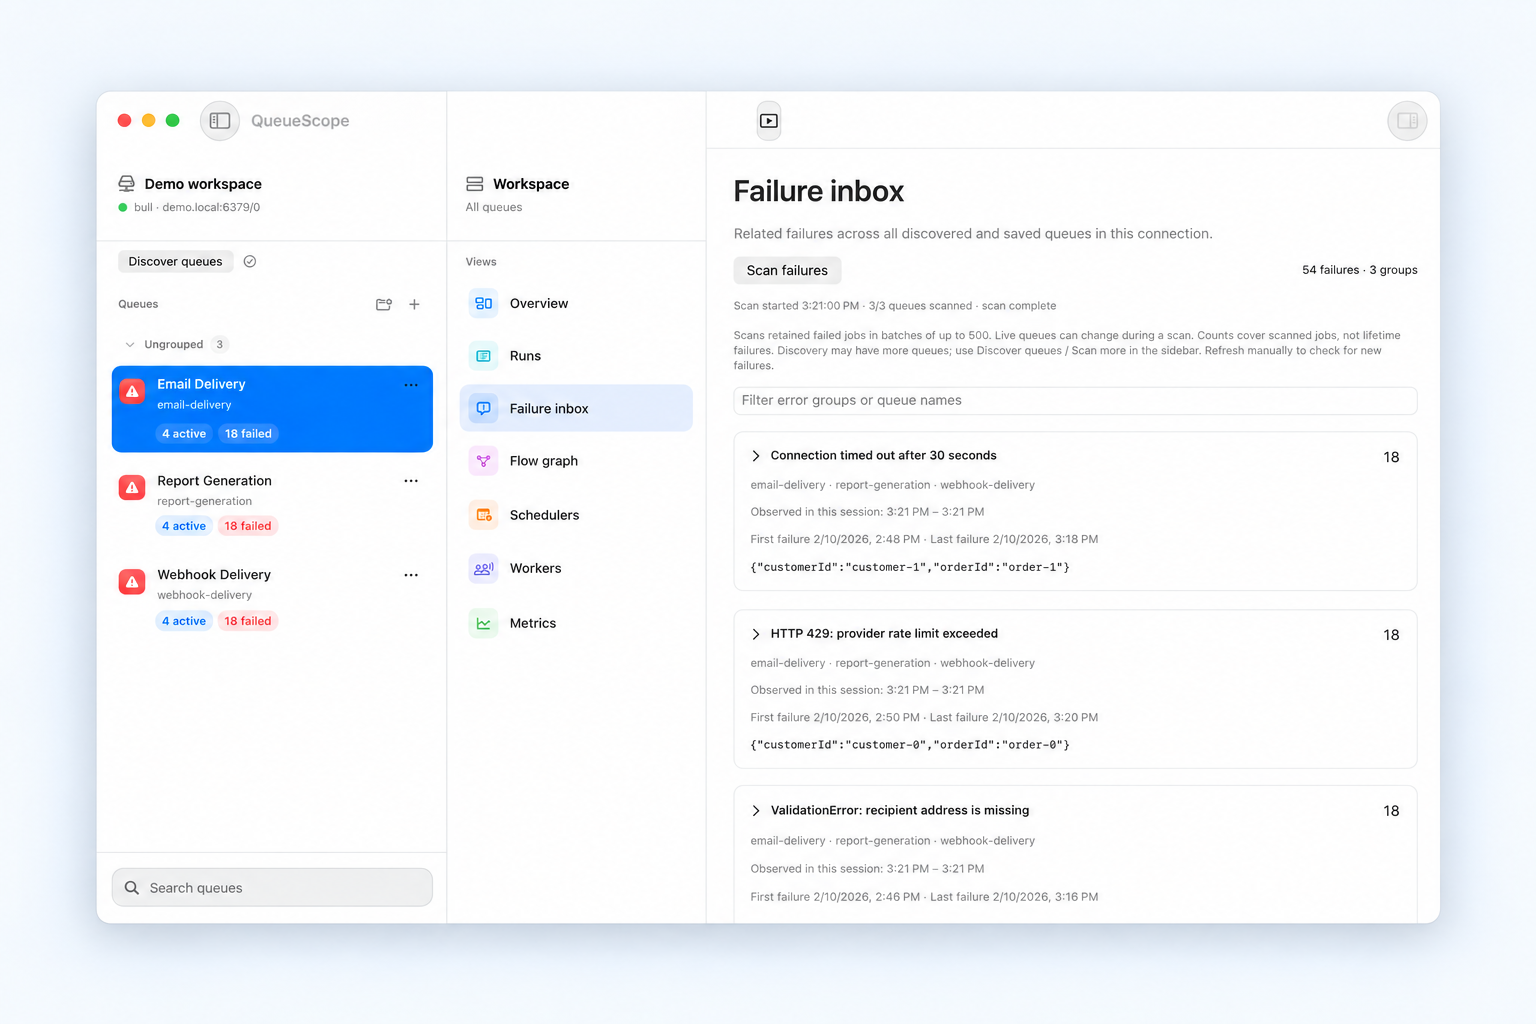
When ready, return to Connection Manager, disconnect, and connect to your Redis instance. Trying the demo does not replace your saved connection settings.
3. Connect to your BullMQ Redis instance
Use the Redis host, port, database, and prefix from your BullMQ application configuration. Match the prefix used by your producers and workers; it is usually bull.
- Enter a connection name, Redis URL, and BullMQ prefix. Use
redis://for TCP orrediss://for TLS. Percent-encode reserved characters in credentials. - Enable Read-only connection to begin with inspection.
- Choose Test connection to check network/TLS, Redis authentication, and queue discovery permission without changing your current session.
- Choose Connect. A new workspace discovers queues automatically. Use Discover queues and Scan more when more Redis keys remain, or add a queue by name.
- Choose Save to remember the connection. Release builds store Redis credentials in macOS Keychain.
If Redis is on a private network, follow the SSH connection guide with your existing key or agent. The Redis destination must be reachable from the SSH server.
A read-only profile prevents QueueScope job mutations. Use Redis ACLs for server-enforced permissions. Dashboard reads need permissions such as PING, SCAN, list/sorted-set reads, and hash reads; worker discovery also needs CLIENT LIST. Development builds use a separate unencrypted credential store; use release builds for Keychain-backed storage.
4. Inspect a retained job
Select a queue and inspect its jobs by state, or open Failure inbox. Enable All queues to group failures across discovered and saved queues in the active connection and prefix. Use Scan more until the coverage indicator shows the scan is complete.
Start with the payload, failure reason, stack trace, and attempts. Read how to investigate failed jobs before deciding to retry. For blocked flows, follow the waiting-children guide.
Connected, but something is missing?
- No queues: check the Redis database and BullMQ prefix against your worker configuration, then complete discovery with Scan more.
- No failed jobs: confirm the selected queue and failure-inbox scope. Removed jobs cannot be reconstructed; check job retention and scan coverage.
- Connection test fails: check network reachability, authentication, TLS hostname, and Redis ACLs. For SSH, verify the host in Terminal first and load passphrase-protected keys into your SSH agent.